Build an Ansible platform in the dashboard
In this tutorial you’ll use the kikx dashboard to build a small Ansible project for a platform with two web servers and a database server. You’ll start from an inventory you already have, add group vars, a playbook with two plays and a role condition, a site playbook and an Ansible config. Along the way the dashboard will spot a mistake in the inventory; you’ll fix it, let it scaffold the missing roles, look at the architecture it draws, and download the result.
It takes about twenty minutes.
Before you start
You need:
a web browser;
a terminal with uv, which you’ll use to check the result with Ansible without installing it.
The last step also uses the kikx CLI. If you haven’t installed it yet,
Your first project with the CLI shows how.
Open the dashboard
Open the kikx dashboard in your browser. You should see the kikx home page with a form headed Or build it here. Above it, Start from a template offers ready-made projects; in this tutorial you’ll start from an empty one instead.
To work on kikx itself with a local copy of the dashboard, see Run kikx locally.
Create the project
Fill in the form:
Project name:
platformDefault namespace: leave it as
defaultOutput directory:
infra
Click Start building.
You’re now in the builder. It has three columns: the stages on the left (Provision, Inventory, Configure, Deploy, Custom), the editor in the middle, and the Project panel on the right, which says Nothing yet. Most projects start with an Inventory. Here is the same layout on a much larger project:
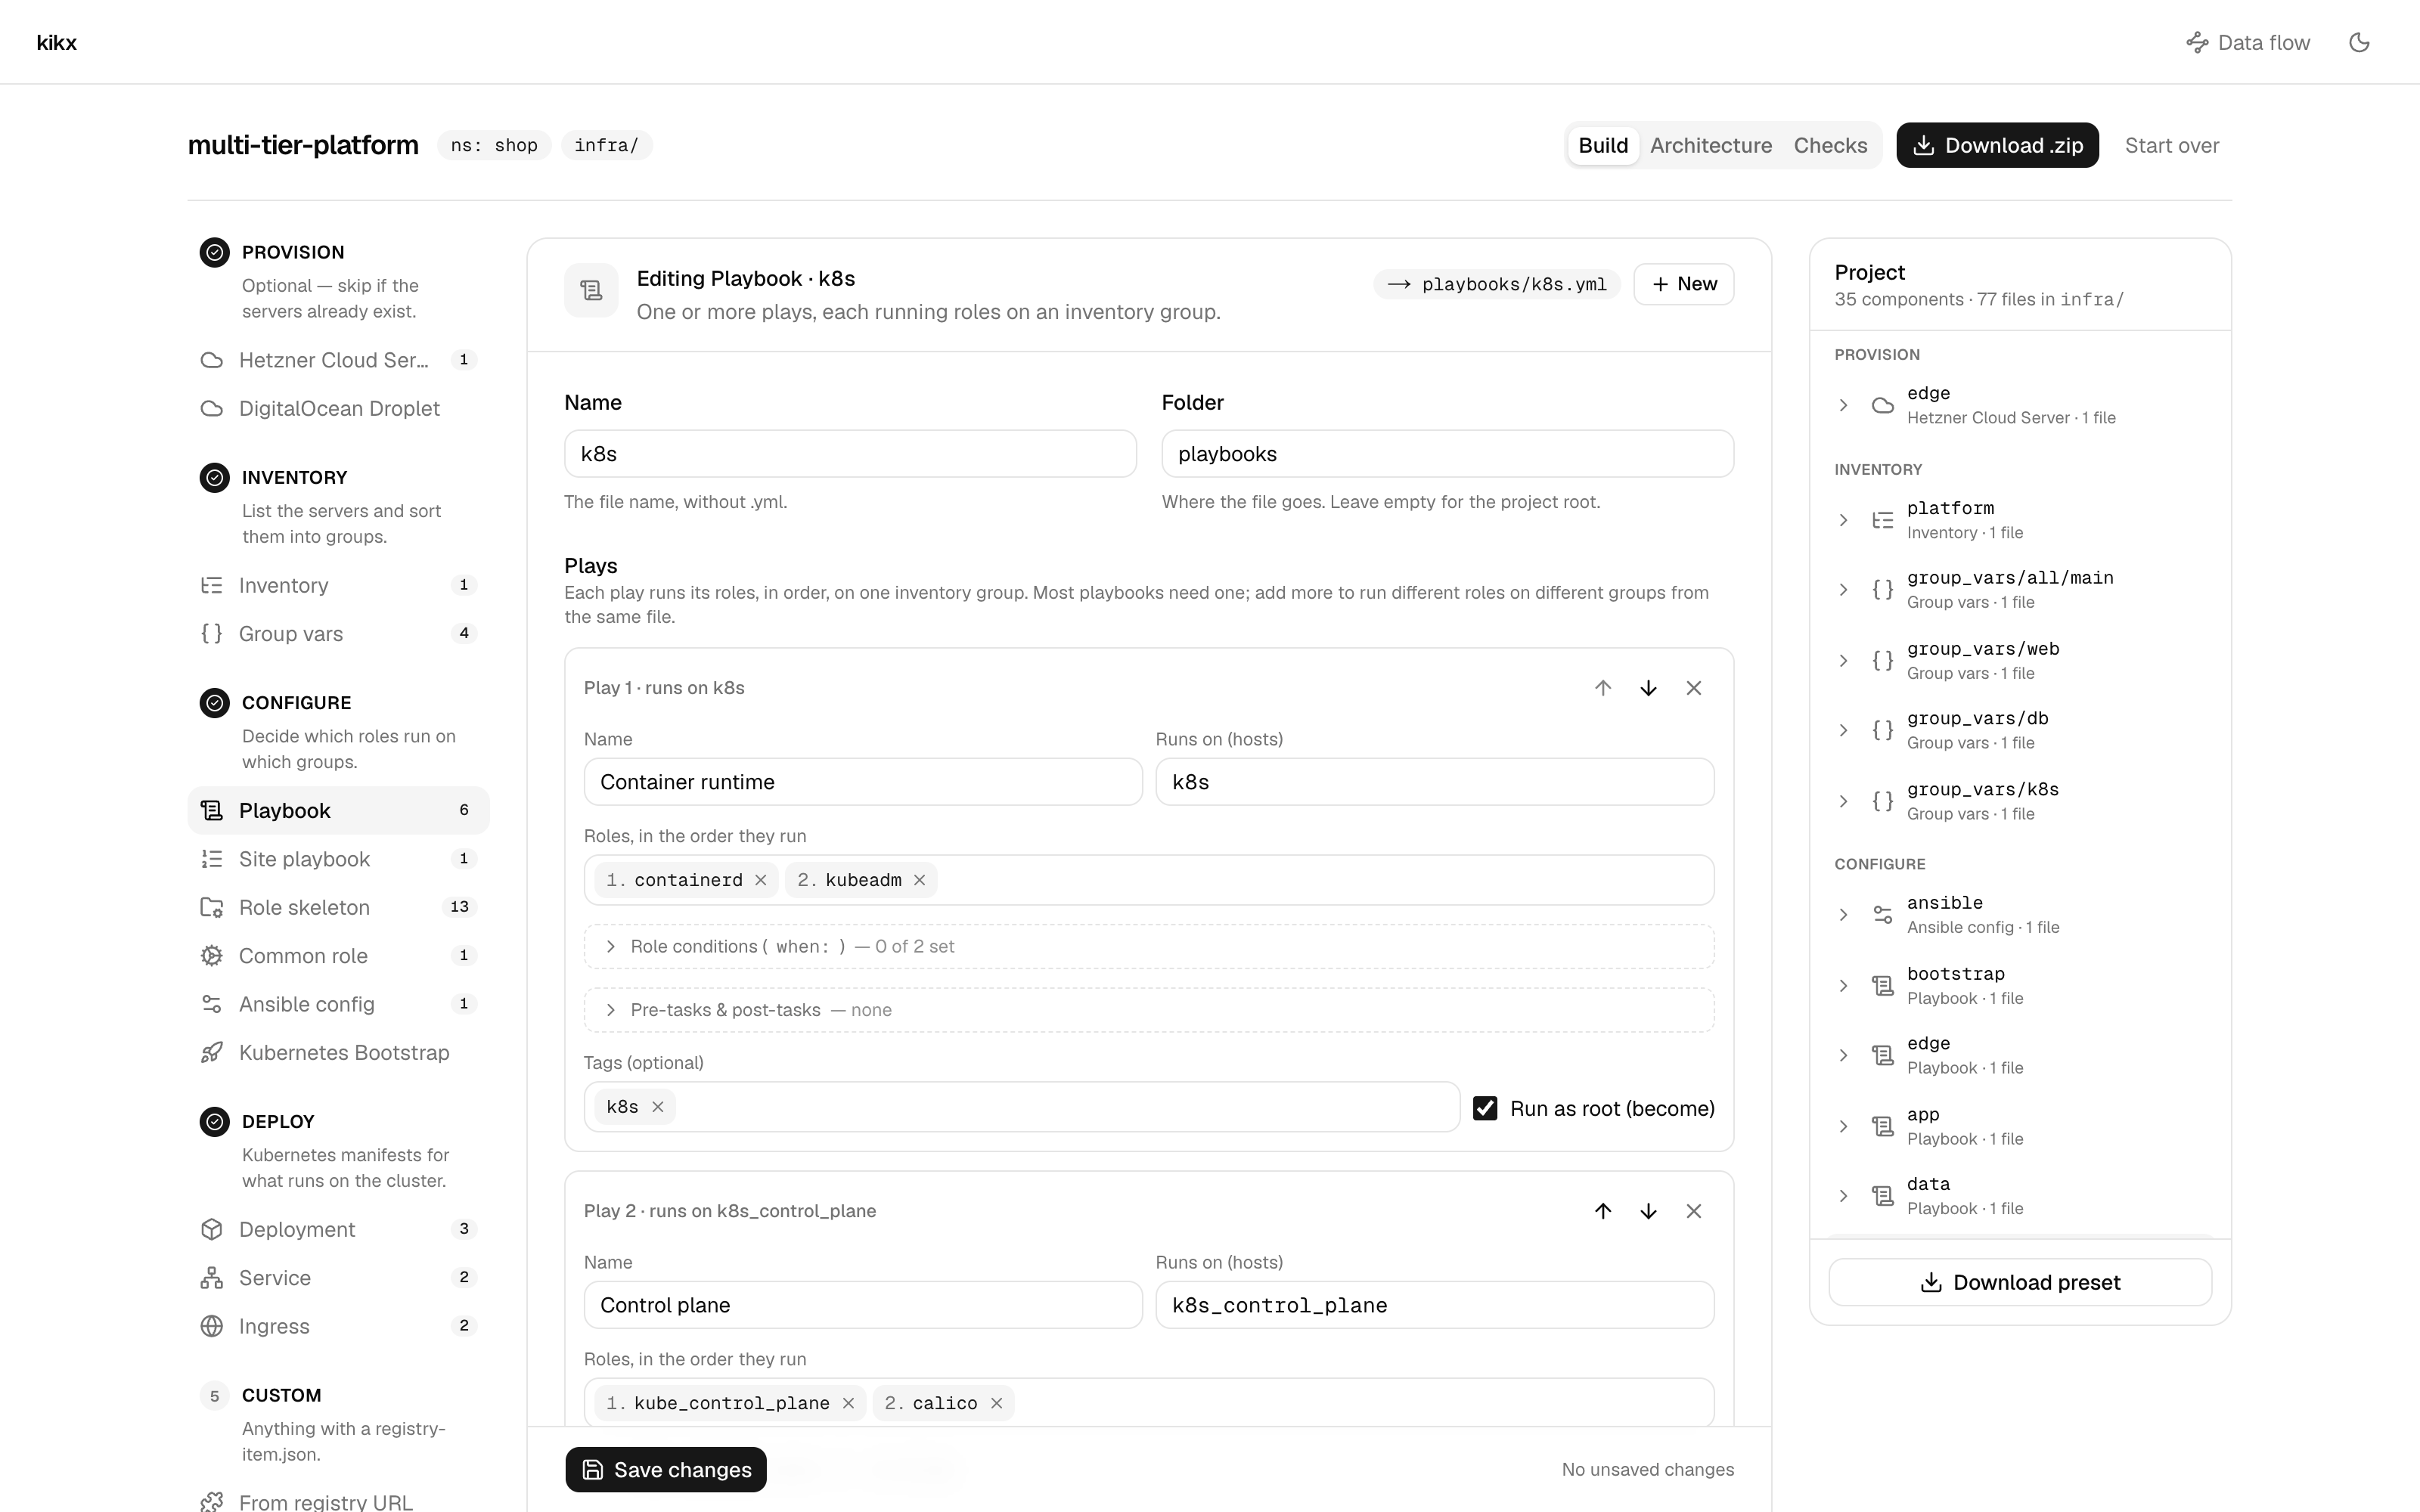
Above the columns you see the project name, the badges ns: default and infra/, and three tabs:
Build, Architecture and Checks.
Import an inventory
The editor already shows New inventory, and its Name field says platform. Instead of
typing the hosts one by one, you’ll paste an existing inventory.
Next to Hosts (1), click Import inventory.ini. A dialog titled Import an existing inventory opens. Paste this into the text area:
[web]
web-01 ansible_host=192.0.2.10
web-02 ansible_host=192.0.2.11 ansible_user=root

[db]
db-01 ansible_host=198.51.100.20

[platform:children]
web
db

[platform:vars]
ansible_user=deploy
Under the text area the dialog counts 3 hosts · 3 groups. Click Replace hosts & groups.
The dialog closes and the form fills in: Hosts (3) with web-01, web-02 and db-01, and a
Groups section with web, db and platform. The platform row lists web and db as child
groups and ansible_user=deploy as its vars.
Scroll down to Preview. It shows platform-inventory.ini, rendered as you’d get it:
[web]
web-01 ansible_host=192.0.2.10
web-02 ansible_host=192.0.2.11 ansible_user=root

[db]
db-01 ansible_host=198.51.100.20

[platform:children]
web
db

[platform:vars]
ansible_user=deploy
Click Add to project. A notification says Added platform, and the Project panel now
lists platform under Inventory.
Notice two other things: the Project panel shows 1 warning with a Review button, and
the Checks tab has a count of 1. Leave that for now; you’ll come back to it.
Add group vars
The database servers need some nested settings. In the left column, under Inventory, click Group vars. The editor switches to New group vars.
In Group, type
db.Tick Folder layout so the file becomes
group_vars/db/main.yml.Next to Variables, switch from Key / value to YAML.
Paste this into the text area:
postgres:
  version: 16
  max_connections: 200
  databases:
    - app
    - reports
The preview shows group_vars/db/main.yml:
---
postgres:
  version: 16
  max_connections: 200
  databases:
    - app
    - reports
Click Add to project. The Project panel now has group_vars/db/main under Inventory.
Add a playbook with two plays
In the left column, under Configure, click Playbook.
In Name, type
services.In Folder, type
playbooks. The field showsplaybooksin grey before you type; that’s only a hint, so type it.
Fill in Play 1:
Name:
Web tierRuns on (hosts):
webRoles, in the order they run: type
nginxand press Enter. It becomes a numbered chip.
Click Add play and fill in Play 2:
Name:
Database tierRuns on (hosts):
dbRoles, in the order they run: type
postgresand press Enter, thenbackupsand press Enter.
Backups should be something you can switch off. Under Play 2, open Role conditions (when:). It
lists one field per role. In the field next to backups, type:
backups_enabled | default(true)
The preview shows playbooks/services.yml:
---
- name: Web tier
  hosts: web
  become: true
  roles:
    - nginx

- name: Database tier
  hosts: db
  become: true
  roles:
    - postgres
    - role: backups
      when: backups_enabled | default(true)
Click Add to project. services appears in the Project panel under Configure.
Add the site playbook
Under Configure, click Site playbook.
In Name, type
site.Under Imports, in run order, next to from this project:, click the
playbooks/services.ymlchip. A row appears with that path.The row’s name is filled in with the first play’s name,
Web tier. This import runs the whole playbook, so replace it withServices.
The preview shows site.yml:
---
- name: Services
  import_playbook: playbooks/services.yml
Click Add to project. The Project panel now reads 4 components · 4 files in infra/.
Add an Ansible config
The playbook lives in playbooks/, and its roles will live in roles/ at the top of infra/.
Ansible looks for roles next to the playbook, so it needs an ansible.cfg that points at them.
Under Configure, click Ansible config. The editor switches to New ansible config, and
Name already says ansible.
In Inventory file, type
platform-inventory.ini. The field shows it in grey before you type; that’s only a hint, so type it.Leave Roles path as
roles.
The preview shows ansible.cfg:
[defaults]
inventory = platform-inventory.ini
roles_path = roles
Click Add to project. The Project panel now reads 5 components · 5 files in infra/.
Fix the warning
Click the Checks tab. The page lists what kikx found when it cross-checked your components:
under Warnings: web-02 sets ansible_user=root, overriding [platform:vars] ansible_user=deploy, with the explanation Host vars win over group vars. Clear ansible_user on the host if the group value is the one you want.
under Notes: services uses 3 roles kikx doesn’t vendor, listing
nginx, postgres, backups.
The warning is right: the pasted inventory still had an old ansible_user=root on web-02, so it
would ignore the deploy user every other host uses. Fix it:
Next to the warning, click Open platform. You’re back in the Build tab, in Editing Inventory · platform.
On the
web-02row, open Connection & host vars. Its summary says user root.Clear the ssh user (inherit) field.
In the preview, the web-02 line loses its user:
web-02 ansible_host=192.0.2.11
Click Save changes. A notification says Saved platform. The warning count disappears from the Project panel and from the Checks tab.
Scaffold the roles
Click the Checks tab again. Only the note is left: services uses 3 roles kikx doesn’t vendor.
Click Scaffold 3 roles. A notification says Scaffolded 3 roles, and the page now reads:
No conflicts found — hosts, groups, playbooks and manifests all line up.
Click the Build tab. The Project panel lists nginx, postgres and backups under
Configure, each a Role skeleton · 4 files. Click the arrow next to postgres to see its
four files, and click roles/postgres/tasks/main.yml to read it:
---
- name: Placeholder — replace with the real tasks for postgres
  ansible.builtin.debug:
    msg: "postgres ran on {{ inventory_hostname }}"
Look at the architecture
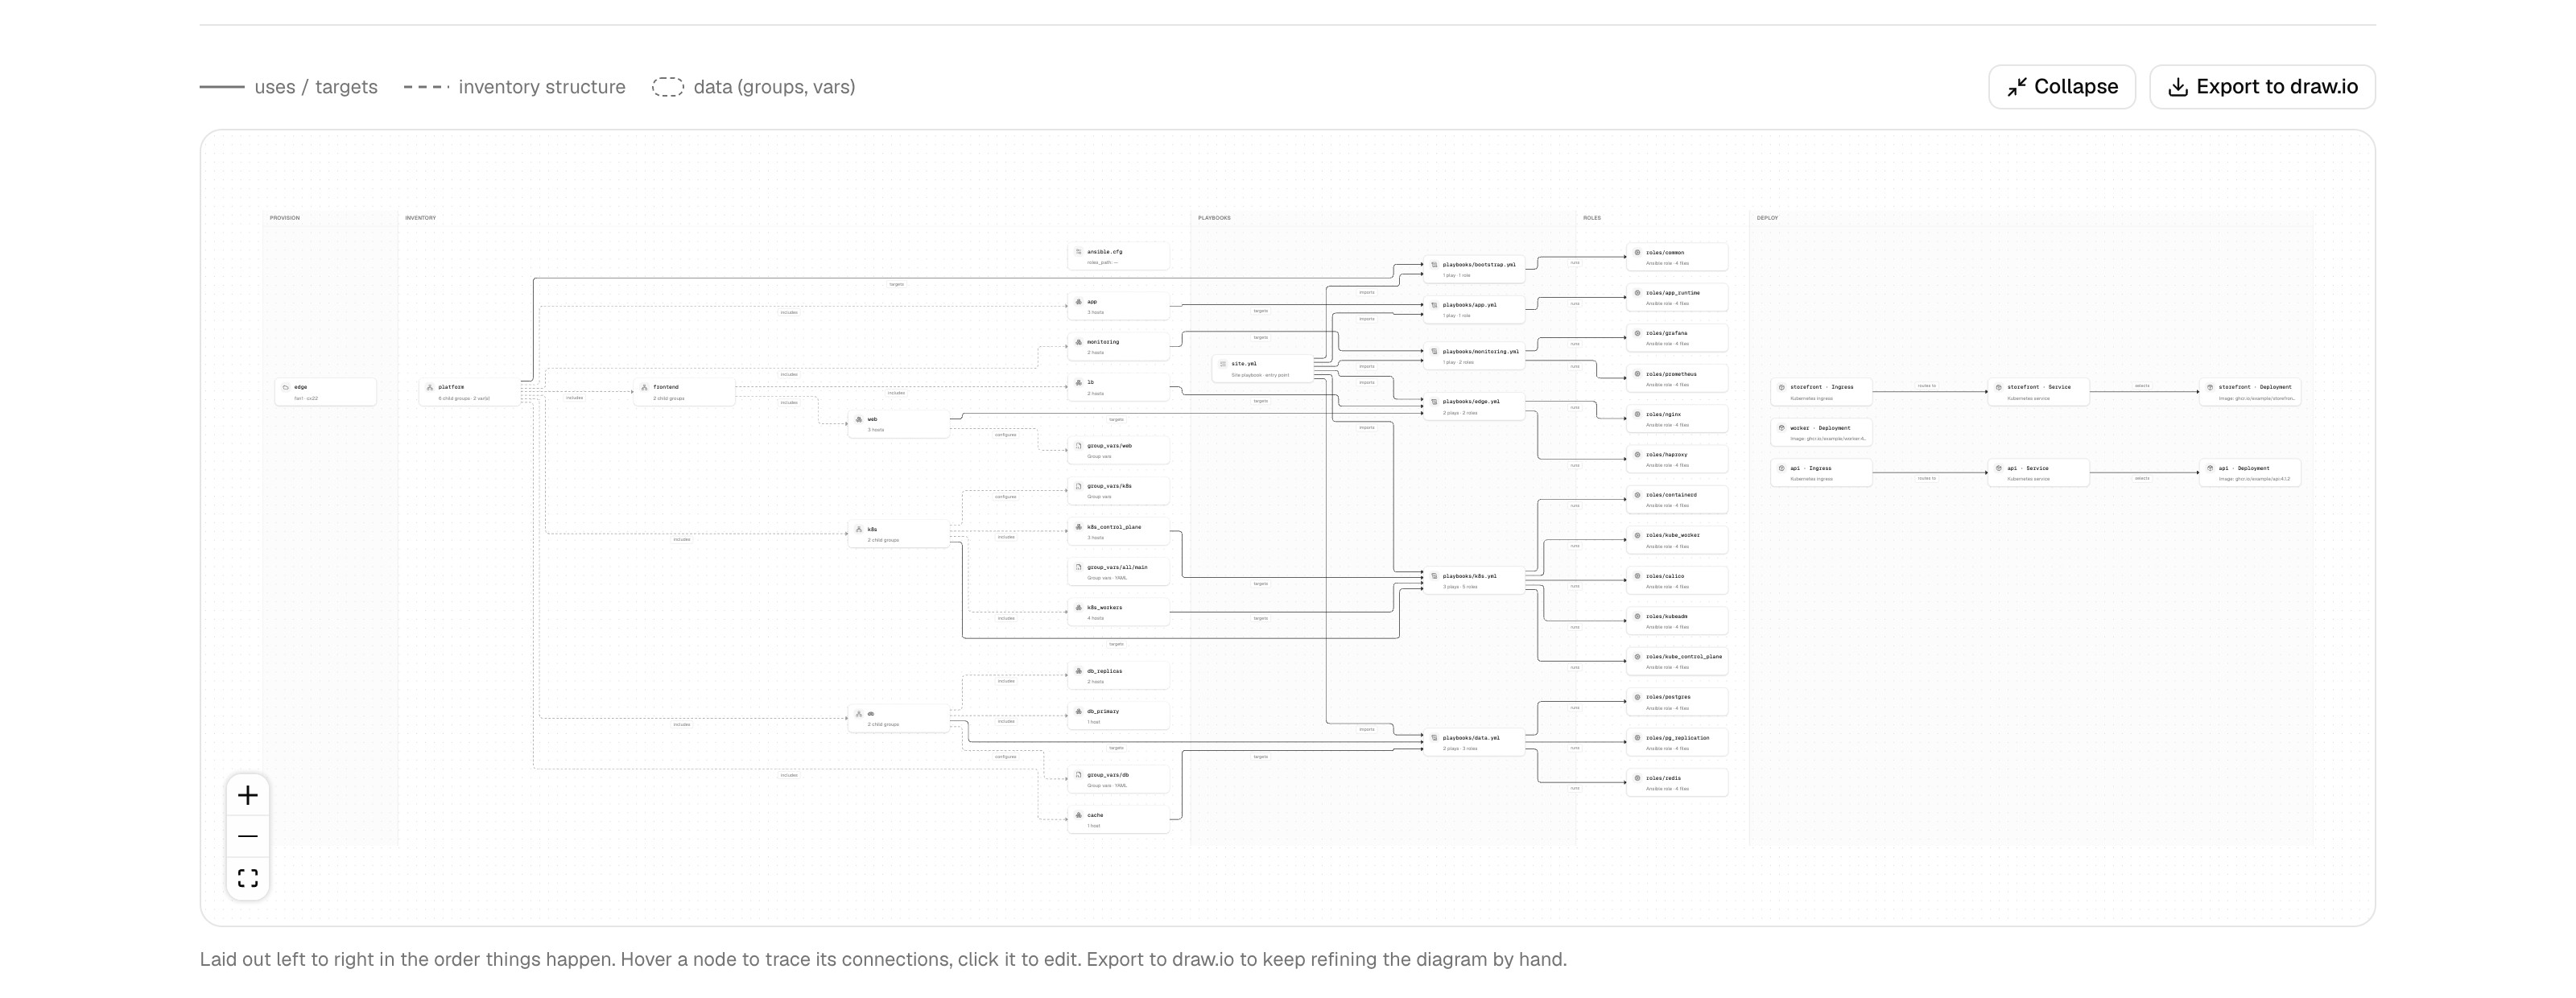
Click the Architecture tab. kikx draws your project in swimlanes, left to right in the order things happen: Inventory, Playbooks, Roles.
You should see:
ansible.cfg(roles_path: roles) in the Inventory lane, with no edges;platform(2 child groups) with an includes edge toweb(2 hosts) and one todb(1 host);group_vars/db/mainwith a configures edge todb;playbooks/services.yml(2 plays · 3 roles) with targets edges towebanddb;site.ymlwith an imports edge toplaybooks/services.yml;three runs edges from the playbook to
roles/nginx,roles/postgresandroles/backups.
Hover a node to highlight its connections; click one to open it in the editor. On a larger project the same view looks like this:
Download the project
Click Download .zip at the top right. Your browser saves platform.zip. Unzip it into an empty
directory and look inside:
unzip platform.zip -d platform
cd platform
find . -type f | sort
./infra/ansible.cfg
./infra/group_vars/db/main.yml
./infra/platform-inventory.ini
./infra/playbooks/services.yml
./infra/roles/backups/defaults/main.yml
./infra/roles/backups/handlers/main.yml
./infra/roles/backups/meta/main.yml
./infra/roles/backups/tasks/main.yml
./infra/roles/nginx/defaults/main.yml
./infra/roles/nginx/handlers/main.yml
./infra/roles/nginx/meta/main.yml
./infra/roles/nginx/tasks/main.yml
./infra/roles/postgres/defaults/main.yml
./infra/roles/postgres/handlers/main.yml
./infra/roles/postgres/meta/main.yml
./infra/roles/postgres/tasks/main.yml
./infra/site.yml
./kikx.toml
Nothing was written to your disk until now: the project lived in the browser tab.
Check that Ansible reads what you built. From infra/, ask it about db-01:
cd infra
uvx --from ansible-core ansible-inventory -i platform-inventory.ini --host db-01
{
    "ansible_host": "198.51.100.20",
    "ansible_user": "deploy",
    "postgres": {
        "databases": [
            "app",
            "reports"
        ],
        "max_connections": 200,
        "version": 16
    }
}
The user comes from [platform:vars] and the settings from the group vars you pasted. Then check
the playbooks. ansible.cfg gives Ansible the inventory and the roles path, so no other option is
needed:
uvx --from ansible-core ansible-playbook site.yml --syntax-check
playbook: site.yml
Download the preset
Go back to the dashboard and the Build tab. At the bottom of the Project panel, click
Download preset. Your browser saves platform.kikx-preset.json, and the button is replaced by
two commands:
kikx setup ./platform.kikx-preset.json
kikx apply ./platform.kikx-preset.json
The preset is the recipe for your project, not the files themselves. Rebuild the project from it with the CLI, in a new empty directory that contains only the preset:
mkdir rebuilt
cd rebuilt
cp ~/Downloads/platform.kikx-preset.json .
kikx setup ./platform.kikx-preset.json
kikx lists the 17 files it wrote. The first line reads:
Initialized kikx project `platform` — wrote 17 file(s) to …/rebuilt/infra
They’re the same files as in the zip.
What you’ve done
You imported an existing inventory, added YAML group vars in a folder layout, wrote a two-play
playbook with a role condition, wired it into site.yml and pointed Ansible at your roles with
ansible.cfg. The Checks view caught a host var silently overriding a group var; you fixed it and
scaffolded the three roles the playbook needed.
You saw the architecture kikx drew from your components, downloaded the project as a zip that
Ansible accepts, and rebuilt it from a preset with the CLI.
When you want to go further:
bring your own inventory: Import an existing Ansible inventory;
more plays, pre-tasks and post-tasks: Write a multi-play playbook with role conditions;
every check and what triggers it: Checks reference;
keep refining the diagram by hand: Export the architecture to draw.io;
setupversusapply: Share a project as a preset;start from a ready-made project instead of an empty page: Start from a template;
how the edges are chosen: How the architecture diagram is drawn.